Regular readers of this blog will know that I have been working on the design of a family bathroom for my friend and practise client for a number of months now. I am happy to report that a couple of weeks ago we nailed down the design and placed the order for all the fittings and fixtures ready for the installation to take place in early 2014.
It was then a week later that I was contacted by C.P. Hart – a major supplier of luxury bathroom furniture and fittings to be part of a blogger challenge where I would have to design a family bathroom with the dimensions of 3 metres by 2 metres (which is the average size of the family bathroom in the UK). So considering that a) the bathroom I have designed is in fact 3×2 and that the order placed with the exception of the tiles was all through C.P. Hart, I couldn’t really refuse the challenge.
So here is a guide on how I went about designing the family bathroom together with some lesson’s learned along the way.

The requirements for this project were very clear. The bathroom and toilet were separated and they wanted to integrate the 2 rooms into one large family bathroom that would be used by their two children and visiting guests. All tiles and bathroom fittings would be replaced and they were happy to perform structural work if required. In terms of fittings, the only key requirement was for a double sized basin that had a single trough to be incorporated into the scheme.

I then went about drawing up a floor plan for the existing layout and proceeded to put together some possible options for the new layout. We met several times and went through various options. During these sessions, we had to consider practicalities such as plumbing and how much structural work we would go ahead with.
The major structural changes include:
- The removal of 2 windows in the existing plan to be replaced with a long narrow window across the top of one wall.
- The existing door will be relocated and replaced with a sliding door to create more usable space within the room.
- The double basin with LED mirror above it will be main focal point of the room and has been placed directly opposite the door for maximum impact.
- Extra height storage will be built into the room to hide dirty laundry and spare towels.


Read design magazines and use inspirations board sites like Pinterest.com to get idea’s on what you’d like to include into the scheme. I asked my client to create a Pinterest board and pin examples of bathrooms that appealed to them. We then visited several showrooms to get inspiration and idea’s.
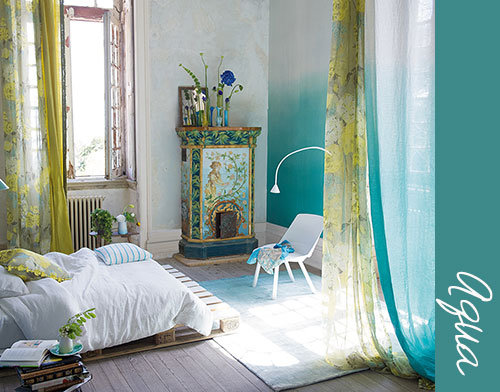
In the end, it became clear that they wanted to go for a contemporary and clean style that included some organic or textured detailing. During a visit to the Stone and Ceramic Warehouse, we found the tiles that would set the colour scheme. The Rust White tile mimics the organic nature of rust in a white, grey and caramel colour combination would go on the floor and then paired with a light grey tile called Ben Nevis would form the basis of the scheme.

Image Source: Stone and Ceramic Warehouse

The people in the showrooms deal with their product day in day out. Use the opportunity to get idea’s from them and utilise their expertise. As someone who is learning about Interior Design, I took the opportunity to try to get as much information from the sales people as possible. Here are some things I learnt:
- Lighting is extremely important in the design of a bathroom. If your bathroom is not going to have much natural light, the ambient and background lighting is important. We decided to incorporate recessed LED lighting under the bathtub, under the sink basin, to light up the mirror. A small alcove above the toilet would house a spotlight and the spot lights in the ceiling would be on a dimmer switch for control.
- When creating a contemporary minimalist bathroom, the fittings are very important as they will stand out against the simplicity of the wall. It was therefore important that these elements were distinct and to a high specification. To create harmony and cohesion, the fixtures were chosen from the same manufacturer and where possible range.
- When choosing tiles, the larger the tile size the cleaner the look. Large sized tiles on the floor will make a small room look larger. We chose 60x60cm tiles for both the floor and the walls.
- If you are on a strict budget, the trick is to go for more expensive tiles on the smaller surface area, which in this case was the floor to create impact and then go cheaper on the walls.
- In a small bathroom, choose wall hung furniture so that you can see more of the floor. This will make the space seem bigger.

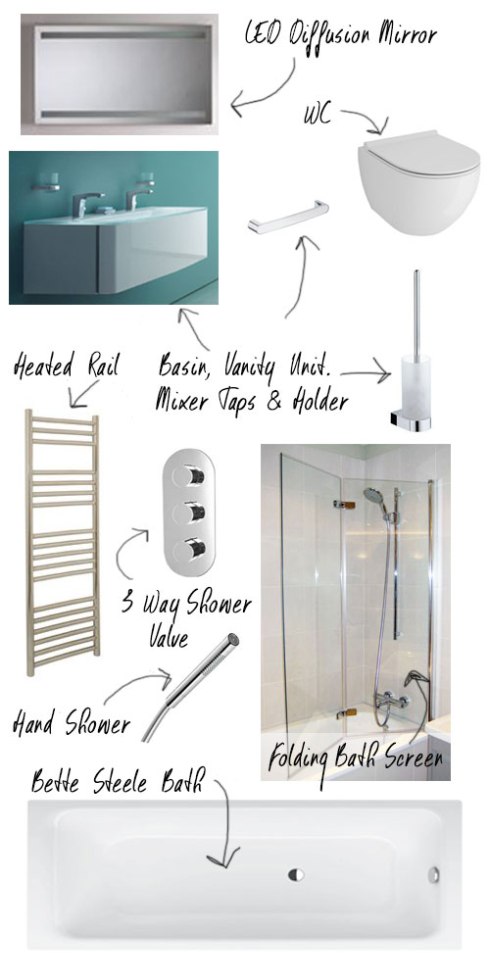
And the final step is to purchase all of your fittings and fixtures. Always check with your supplier for lead times on orders so that you know when to arrange the builder to come around and don’t forget delivery. So here are the products we have purchased from C.P. Hart.
If you’re interested in any of the items we purchased, more details can be found on the pinterest board that I’ve created where all the products are listed and can be found at http://www.pinterest.com/interiornovice/cp-hart-3×2-bathroom-challenge/
Of course, C.P. Hart have an exceptionally large range of bathroom products that you can find at http://www.cphart.co.uk/ well as Wet Rooms http://www.cphart.co.uk/bathrooms/showers/home_spa_wet_rooms/.
I hope you have enjoyed reading the process as much as I did experiencing it. I have learnt so much about the realities of designing for someone else. Special thanks has to go to my dear friend who has supported and encouraged me all the way through the design process. I will follow up in the New Year with you all when the bathroom is finished.
This was a sponsored post, however the design, words and opinions are my own.
Till next time. xD